Recommended Pedals
The essential Flanger pedals to know about
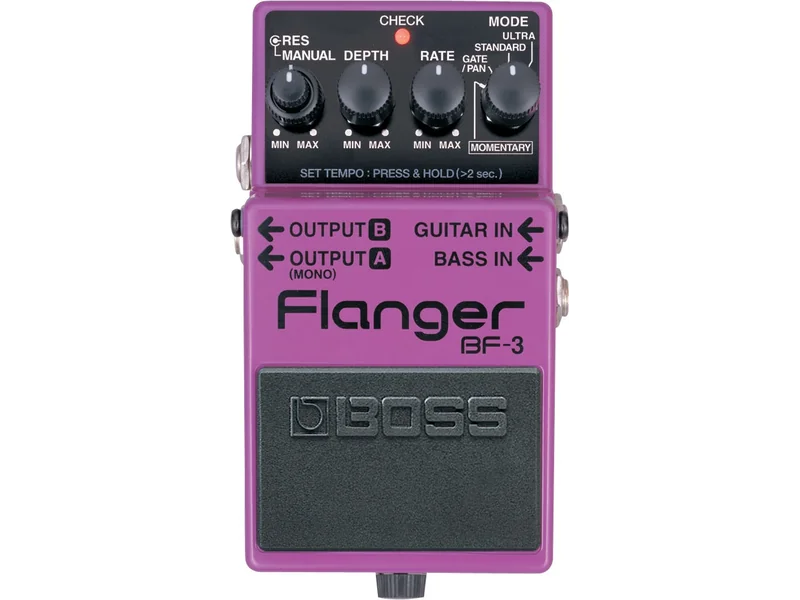
Boss BF-3 Flanger
Industry standard for analog flanging warmth. True bypass, simple controls, incredibly durable. This is what most touring musicians use.
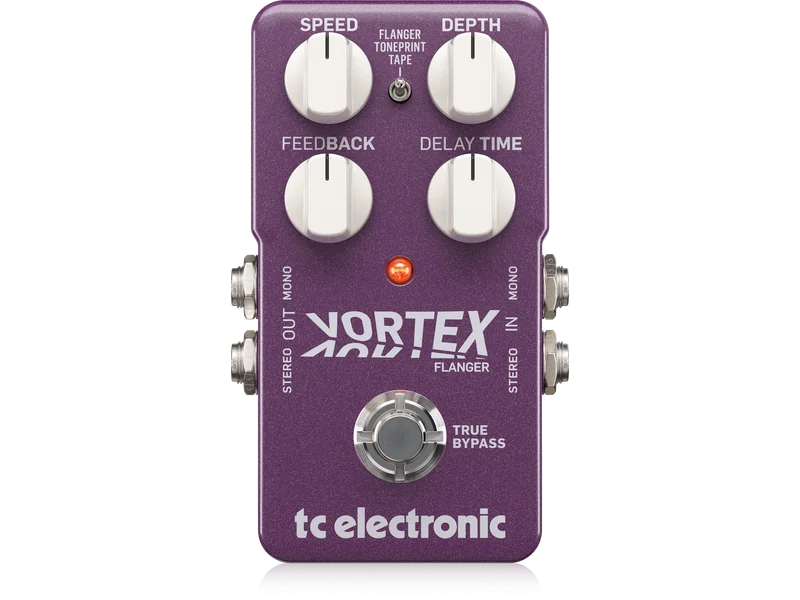
TC Electronic Vortex Flanger
Digital precision with multiple flanger modes. Stereo capabilities, clean tone, exact parameter control. Perfect for studio or modern rigs.
Boss BF-3 Flanger
Boss BF-3 with high feedback creates wild, experimental tones. Great for soundscapes and experimental music.
Boss BF-3 Flanger
Classic analog flanging perfect for Van Halen-style tones. Warm, obvious effect that defines the era.
TC Electronic Vortex Flanger
Clean digital flanging adds dimension without obvious effect. Perfect for supporting songs rather than dominating them.
Flanging creates a whooshing, sweeping effect by mixing your signal with a delayed copy and modulating the delay time rapidly.
What Is Flanging? The Physics of a Jet Engine Effect
Flanging is one of the most visually obvious effects in guitar, yet most players don't understand what's actually happening. Let's demystify it.
The Basic Principle: Mixing Delay with Modulation
At its core, flanging works like this:
- Take your guitar signal (dry)
- Create a second copy and delay it by 2-20 milliseconds
- Modulate (change) that delay time using an LFO (Low Frequency Oscillator)
- Mix the delayed copy back with the original
The result: The two signals create phase relationships that sweep through different frequencies, creating the characteristic "whooshing" jet engine sound.
The Delay Range: Why 2-20 Milliseconds Matters
This is crucial to understand: Different delay times create different sonic character.
2-5 milliseconds:
- Creates phase cancellation in higher frequencies
- Produces bright, shimmery, less obvious effect
- Subtle, musical, adds dimension
- Good for rhythm sections and ambient tones
5-10 milliseconds:
- Balanced flanging with mid-presence
- Classic flanger sound (what most flangers do by default)
- Obvious but not overwhelming
- Versatile for most playing styles
10-20 milliseconds:
- Creates notches in lower frequencies
- Darker, more obvious effect
- Can sound like whooshing or helicopter
- Vintage flanger character (original 1970s designs)
The pro insight: Professional players adjust delay range based on the song. Fast, bright songs use shorter delays (more subtle). Slow songs or dramatic passages use longer delays (more obvious effect).
The LFO: The Engine That Moves Everything
The LFO (Low Frequency Oscillator) is what makes the delay time change over time, creating the movement.
Rate (Speed):
- Slow rate (0.5-2 Hz): Smooth, gradual sweep (1 sweep per 2-4 seconds)
- Medium rate (2-5 Hz): Standard flanger (1 sweep per second)
- Fast rate (5-10+ Hz): Intense, obvious effect (multiple sweeps per second)
Depth (Intensity):
- Shallow depth: Subtle effect, hard to notice
- Medium depth: Obvious, musical effect
- Deep depth: Extreme, obvious effect (can sound cheesy)
Waveform:
- Sine wave: Smooth, musical sweep
- Triangle wave: More angular, geometric sweep
- Square wave: Abrupt, step-like sweeping (rare)
The professional approach: Set rate around 0.7 Hz (slow, smooth sweep) for rhythm playing. Increase to 2-3 Hz for solos to add energy. Depth should be moderate—the effect should be obvious but not overwhelming.
Feedback: The Secret Control That Nobody Uses
Most flangers have a feedback or regeneration parameter that few players understand.
What it does: Takes the delayed signal and feeds it back into itself, creating resonance peaks in the sound.
At zero feedback:
- Clean, simple flanging
- Just mixing delay with original
- Subtle and musical
At positive feedback (25-50%):
- Creates peaks in the frequency sweep
- Sound becomes more pronounced and obvious
- Adds character and aggression
- More obvious "jet engine" tone
At high feedback (75-100%):
- Creates extreme resonance peaks
- Sound becomes almost metallic
- Can self-oscillate or feedback excessively
- Useful for experimental tones, rarely for music
The professional secret: Increase feedback slightly (15-30%) to add character without losing musicality. Zero feedback sounds boring; too much sounds out of control.
Dry/Wet Balance: The Blending Control
The dry/wet parameter controls how much of the flanging effect you hear versus the original signal.
100% dry, 0% wet:
- No effect at all (not useful)
80% dry, 20% wet:
- Subtle flanging (barely noticeable)
- Good for adding dimension without obvious effect
- Professional rhythm playing
50% dry, 50% wet:
- Obvious flanging (full effect presence)
- Classic flanger tone
- What most players recognize as "flanging"
0% dry, 100% wet:
- Pure effect signal (unusual)
- Interesting for layering, not typical
- Used in experimental/ambient music
The pro approach: Keep dry signal at 70-80% for rhythm (subtle) or 50-60% for solos (obvious effect). Full wet mixing is rarely musical unless you're going for specific experimental tones.
Flanger vs. Chorus: The Confusion
Flangers and chorus are both modulated delay effects. Many players confuse them. Here's the difference:
Flanging:
- Delay range: 2-20 milliseconds (very short)
- LFO modulates delay time continuously
- Creates comb filter (frequency cancellation) effect
- Sound: Whooshing, jet engine, sweeping
- Obvious, noticeable effect
Chorus:
- Delay range: 20-50 milliseconds (medium)
- LFO modulates delay time continuously
- Creates doubling effect (sounds like two instruments)
- Sound: Lush, thick, spacious
- Adds dimension subtly
The simple rule: If it sounds like a jet engine, it's flanger. If it sounds like two people playing the same part, it's chorus.
In your signal chain:
- Flanger is more aggressive and obvious
- Chorus is subtler and more musical
- Use flanger for solos and dramatic moments
- Use chorus for rhythm parts and texture
Flanging Techniques: From Subtle to Extreme
Subtle Flanging: Dimension Without Effect
Settings:
- Rate: Slow (0.5-1 Hz)
- Depth: Shallow (30-50%)
- Feedback: 0-10%
- Dry/Wet: 70-80% dry
What it sounds like: Thickens your tone without obvious effect. Adds movement and dimension. Sounds like your guitar is slightly "breathing."
Best for:
- Clean tones (adds character)
- Rhythm parts (adds movement)
- Ambient music (adds space)
- Foundation for combining with other effects
Pro example: Layer this under a chorus or reverb for spatial depth without obvious effect.
Classic Flanging: The Obvious Effect
Settings:
- Rate: Medium (2-3 Hz)
- Depth: Medium (60-75%)
- Feedback: 20-40%
- Dry/Wet: 50-60% dry
What it sounds like: Obvious whooshing jet engine effect. Immediately recognizable as flanger. Dramatic and musical.
Best for:
- Solos that need character
- Arpeggiated passages (flanging moves with notes)
- Dramatic moments
- 1980s rock (Van Halen-style tone)
Pro example: This is the factory default on most flangers. It's the "flanger sound" people expect.
Extreme Flanging: Experimental Tone
Settings:
- Rate: Fast (5-8 Hz)
- Depth: Deep (80-100%)
- Feedback: 50-75%
- Dry/Wet: 30-40% dry
What it sounds like: Intense, overwhelming effect. Helicopter, robot, or experimental spaceship sounds. Barely sounds like guitar.
Best for:
- Experimental music
- Ambient/drone music
- Intentionally weird tones
- Creating textures and pads
- Soundscapes
Pro example: This is not for traditional music, but it's powerful for creating unusual tones and textures.
Signal Chain Placement: Where Flanger Lives
Standard Placement: After Drives, Before Delay/Reverb
The standard signal chain placement for flanger is:
Guitar → Tuner → Boost → Overdrive → Compression (optional) → [FLANGER HERE] → Delay → Reverb
Why this works:
- Flanger modulates delay time, so placing after drives means drives affect the dry signal quality
- Before delay/reverb means both effects see the clean flanged signal
- Clean tone + flanger + delay/reverb creates proper layers
Flanger After Reverb: The Experimental Placement
Some players put flanger after reverb for unusual tones:
Pros:
- Creates spatial, ethereal effect
- Reverb tail gets flanged (creates movement in the space)
- Experimental and interesting
Cons:
- Less traditional
- Can sound uncontrolled
- Flanger modulates the reverb tail (unpredictable)
Best for: Ambient music, soundscapes, experimental tones.
Flanger Before Drives: The Aggressive Option
Some heavy music players put flanger before overdrive/distortion:
Pros:
- Flanger modulates the input to drives
- Creates extreme tone shaping
- Aggressive and obvious effect
Cons:
- Less musical
- Hard to control
- Not standard approach
Best for: Extreme metal, experimental heavy music.
The Key Rule: Don't Chain Multiple Flangers
Never use two flangers in the same rig. The modulated delays stack and create unpredictable phase relationships that sound bad.
Exception: Some multi-effect units have dual flanger modes. These are designed to work together and can create interesting stereo effects.
The Different Types of Flanger Designs
Analog Flanger
How it works: Uses analog circuit to create the delay and modulation. Original design from the 1970s.
Sound characteristics:
- Warm, slightly fuzzy modulation
- Natural, musical tone
- Slight self-noise (electronic hum/hiss)
- Subtle tone coloration even when off
Examples: Boss BF-3 (analog mode), vintage flangers.
Pros:
- Warm, organic character
- Musical-sounding effect
- Professional tone
Cons:
- More expensive
- More prone to noise
- Requires batteries or power
Digital Flanger
How it works: Uses digital processing (DSP) to calculate delay and modulation. Modern approach.
Sound characteristics:
- Precise, clean modulation
- Exact parameter control
- Zero self-noise
- Pure clean tone when off
Examples: TC Electronic Vortex, modern multi-effect units.
Pros:
- Precise control
- Clean tone
- Often cheaper
- More features (multiple flanger types)
Cons:
- Can sound "digital" or sterile
- Less character than analog
- More complicated menus
Stereo Flanger
How it works: Creates separate flanger effects on left and right channels. Produces spacious, 3D effect.
Sound characteristics:
- Wide, spacious, ambient
- 3D effect with headphones
- More subtle than mono flanging
- Professional, polished tone
Requirements:
- Stereo output capability
- Stereo amp setup or interface
- Understood in context of stereo monitoring
Best for:
- Studio recording (stereo capture)
- Live performance with stereo monitors
- Ambient/atmospheric music
- Professional rigs
Note: If you only have mono output (single amp), stereo flanger still works but sounds like a regular flanger in mono.
Flanging in Different Genres
Classic Rock & 1970s: Subtle Enhancement
Tone goal: Add dimension and movement to rock tones without overwhelming the listener.
Settings:
- Rate: Slow (0.7-1.5 Hz)
- Depth: Medium (50-70%)
- Feedback: 10-20%
- Dry/Wet: 75% dry
Famous tones: Santana, early Pink Floyd, Steely Dan.
1980s Hard Rock & Hair Metal: Obvious Effect
Tone goal: Obvious, dramatic effect that defines the song.
Settings:
- Rate: Medium (2-4 Hz)
- Depth: Deep (70-90%)
- Feedback: 30-50%
- Dry/Wet: 40-50% dry
Famous tones: Van Halen, Crue, Ozzy.
Alternative Rock: Texture & Atmosphere
Tone goal: Create atmosphere and texture without obvious effect. Flanging supports the song rather than defining it.
Settings:
- Rate: Slow (0.5-1 Hz)
- Depth: Medium (40-60%)
- Feedback: 0-15%
- Dry/Wet: 80% dry
Famous tones: Radiohead, U2 (The Edge), Pavement.
Ambient & Experimental: Soundscape
Tone goal: Create texture and movement. Flanging IS the point of the music.
Settings:
- Rate: Variable (0.3-8 Hz)
- Depth: Variable (20-100%)
- Feedback: Variable (0-80%)
- Dry/Wet: Variable (0-100%)
Best approach: Experimental, no fixed rules. Use whatever sounds interesting.
The Boss BF-3 Flanger: The Standard
The Boss BF-3 is the professional standard for flangers in live performance.
Why it dominates:
- Analog warmth with analog circuit
- Simple, intuitive controls (Rate, Depth, Feedback, Manual)
- True bypass (doesn't affect tone when off)
- Incredibly durable (10+ year lifespan common)
- Affordable ($200-250 new)
- Used market is strong
The controls:
- Rate: Speed of modulation (slow to fast)
- Depth: Intensity of effect (subtle to extreme)
- Feedback: Character shaping (0-100%)
- Manual: Delay time offset (moves the effect center)
Pro tip: Use Manual control to shift where the effect sits. Move left for darker flanging, right for brighter flanging.
Who should buy: Anyone playing rock, alternative, or any genre that benefits from classic flanger tone. This is the reference standard.
Common Flanging Mistakes and How to Fix Them
Mistake 1: Feedback Too High
Symptom: Flanger sounds metallic, distorted, out of control, like self-oscillation.
Why it happens: Feedback over 60% starts to create excessive resonance peaks that overwhelm the tone.
Fix: Reduce feedback to 20-40% range. Higher isn't always better; 30% feedback is the sweet spot for most applications.
Mistake 2: Dry/Wet Too Wet
Symptom: Flanger effect is so obvious it sounds like the guitar is disappearing. Tone sounds thin.
Why it happens: 100% wet means you're hearing only the effect, not the original signal.
Fix: Keep dry signal at 50% minimum. 70% dry is better for musical tones.
Mistake 3: Rate Too Fast
Symptom: Flanging effect is dizzying, hard to listen to for long periods. Sounds like helicopter.
Why it happens: Rates above 4 Hz create obvious sweeping that sounds unnatural in most music contexts.
Fix: Start with 1-2 Hz rate. Increase only for specific dramatic moments.
Mistake 4: Using Flanger Before Gain Effects
Symptom: Flanger effect gets distorted and destroyed by overdrive/distortion that follows.
Why it happens: Overdrives and distortions change the signal so much that the flanger modulation is lost.
Fix: Put flanger AFTER drives so the effect is preserved cleanly.
Mistake 5: Forgetting the Manual Control
Symptom: Flanger sounds generic or boring compared to other players using the same pedal.
Why it happens: Most players leave Manual at center (default). Manual control shifts the effect character dramatically.
Fix: Experiment with Manual knob. Left side = darker flanging, right side = brighter flanging. Finding the right Manual setting is the key to unique tone.
Flanging + Other Effects: The Combinations
Flanger + Chorus: The Lush Combo
Combining flanger and chorus creates an extremely thick, spacious tone.
How to do it:
- Flanger first (moderate settings, 30% wet)
- Chorus second (moderate settings, 40% wet)
- Both modulating together
Sound result: Massive, thick, spacious tone. Sounds like orchestral layering.
Best for: Ambient music, atmospheric solos, creating texture.
Pro note: Don't use this in traditional rock—it's too much effect.
Flanger + Reverb: The Spacious Tone
Flanger before reverb creates space with movement.
Settings:
- Flanger: 50% wet, medium rate
- Reverb: Large space, medium decay
Sound result: Spacious, moving tone. Sounds like guitar in a large space that's also moving.
Best for: Clean tones, ambient music, creating space.
Flanger + Delay: The Timing Effect
Flanger before delay creates complex timing interactions.
What happens: Flanged signal gets delayed, creating echoes of the swept tone.
Best for: Atmospheric solos, creating rhythmic patterns.
Flanger + Compression: The Glue
Compression before flanger cleans up the dynamics before flanging.
Why this works: Compression stabilizes the tone, allowing flanger to sweep cleanly.
Best for: Consistent, professional tone.
Flanging in Professional Recording
Studio Application: Creating Texture and Movement
In the studio, flangers are often used more subtly than in live performance. The goal is to add interest and dimension without calling attention to the effect.
Studio flanging techniques:
- Blend mode: Record dry guitar and flanged guitar to separate tracks, then blend (10-30% flanged)
- Parallel effect: Use a mixing console's effects send to add flanging alongside the dry signal
- Automation: Automate the effect's parameters over time—slow it down for verses, speed it up for choruses
- Frequency range: Use EQ before flanging to control which frequencies get flanged (often high-pass to remove lows)
Why this works: Blending lets you hear the effect without losing the dry signal's clarity. Automation keeps the listener engaged.
Flanging in Mastering: The Secret Weapon
Professional mastering engineers sometimes use flanging on full mixes for movement and interest. Never on the master bus alone, but sometimes on specific frequency ranges.
When mastering engineers use flanger:
- Adding movement to overly static songs
- Creating width in mono sources
- Adding vintage character to digital recordings
- Fixing phase issues (paradoxically, flanging can help subtle phase relationships)
The pro secret: When flanging is done well in mastering, listeners don't hear "effect"—they hear a more interesting, spacious mix.
Flanging with Guitars of Different Styles
Single-Coil Guitars (Stratocaster, Telecaster)
Single-coil pickups have naturally bright, sharp tone with articulate high-end. Flanging on single-coils:
Best settings:
- Rate: Slow to medium (1-2 Hz)
- Depth: Medium (60-75%)
- Feedback: 15-25%
Why this works: Single-coil brightness can make flanging sound harsh at fast rates. Slower flanging lets the natural attack shine through.
Example tone: Bright, articulate flanging that's musical and controlled.
Humbucker Guitars (Les Paul, SG, ES-335)
Humbuckers are naturally warm, thick, with less high-end articulation. Flanging on humbuckers:
Best settings:
- Rate: Medium to fast (2-4 Hz)
- Depth: Deep (75-90%)
- Feedback: 25-40%
Why this works: Humbucker warmth can make flanging sound muddy at slow rates. Faster flanging adds movement without losing the tone.
Example tone: Lush, thick flanging with lots of movement.
Semi-Hollow Body Guitars (ES-335, Epiphone Casino)
Semi-hollow bodies have natural resonance and feedback characteristics. Flanging behavior:
Consideration: Feedback is already present from the guitar, so be careful with flanger feedback knob. Too much combined feedback can cause uncontrolled oscillation.
Best approach:
- Use flanger feedback conservatively (0-20%)
- Rely on the guitar's natural resonance for character
- Let the semi-hollow body's sustain and bloom shine through
The Psychology of Flanging: Why It Sounds Good
There's something psychologically powerful about the flanging effect that goes beyond the technical specifications.
The Spacious Illusion
Flanging creates phase relationships that trick your brain into hearing space. Even on a single guitar track, flanging sounds like two instruments playing in a large space. This creates:
- Perception of width (sounds stereo even in mono)
- Perception of depth (sounds like it's coming from far away)
- Perception of movement (audio is moving through space)
None of these are actually true, but your brain perceives them because of the phase characteristics.
The Vintage Connection
Flanging sounds vintage because it was invented in the 1970s and defined a generation of music. Hearing flanger immediately evokes:
- 1970s progressive rock
- Van Halen and classic rock
- Psychedelic music
- Experimental and avant-garde
Using flanger today automatically adds nostalgic character, which some players embrace and others try to avoid.
The "Wrong Note Correction" Phenomenon
Interestingly, flanging can mask out-of-tune notes or sloppy playing because the sweeping character distracts from pitch issues. This is why flanger is often used in intentionally imperfect or chaotic music—it hides the chaos while adding chaos, which works.
This is also why flanging is a terrible tool for careful, precise tone work. It masks problems instead of fixing them.
Flanging Mistakes and Pro Solutions
Mistake 6: Using Flanger on Every Song
Symptom: Everything in your setlist sounds the same. Flanging becomes the sonic signature instead of the song.
Why it happens: Once you discover flanging, it's tempting to use it everywhere. It sounds cool, so why not?
Fix: Use flanger sparingly. Save it for songs that deserve it. A flanger-free song makes the flanged song stand out more when you use it.
Professional approach: Most touring musicians use flanger maybe 1-2 times per set. It's a special moment, not a permanent effect.
Mistake 7: Mixing Flanger with Chorus
Symptom: Tone becomes overwhelming, muddy, or disorienting. Too much modulation happening.
Why it happens: Both are modulated delays. Stacking them creates excessive modulation that confuses the listener.
Fix: Choose one or the other. If you want dimension, choose chorus (subtler). If you want obvious effect, choose flanger (more aggressive).
Rare exception: In ambient music, modulated delays can work together if both are dialed back (20-30% wet).
Mistake 8: Forgetting the Dry Signal
Symptom: Flanger effect sounds weak or thin. Can't hear the original guitar anymore.
Why it happens: 100% wet flanger means you're hearing only the modulated copy, not the original signal.
Fix: Keep dry signal at minimum 40% (preferably 50%+). The flanged signal should support the original, not replace it.
Mistake 9: LFO Rate Out of Sync with Song Tempo
Symptom: Flanger effect sounds "off" rhythmically. Doesn't match the song.
Why it happens: Fixed LFO rate doesn't match the song's tempo. The effect feels unrelated to the music.
Fix: Tap tempo feature (if available) or manual adjustment to match song speed. Professional flanger pedals have tap tempo buttons.
Mistake 10: Using Flanger on Sensitive Frequencies
Symptom: Flanger creates weird resonances or cancellations. Tone sounds strange, not musical.
Why it happens: Flanging creates notches in the frequency response. If these notches land on sensitive frequencies (like vocal frequencies around 2kHz), the tone sounds unnatural.
Fix: Use a high-pass filter before flanging to remove unnecessary low frequencies. This cleans up the tone and makes flanging sound more musical.
Final Thoughts: Flanger as a Tool, Not a Sound
Here's the professional truth about flanging: It's a tool, not a sound destination.
Many beginning players think "If I buy a flanger, I'll get that flanged tone." That's like thinking "If I buy a paintbrush, I'll become a painter." The tool is just the beginning.
Flanger mastery means:
- Knowing when to use it (special moments)
- Knowing when to skip it (most moments)
- Understanding what it adds (movement and space)
- Dialing it in for your guitar and amp
- Using it musically, not as a gimmick
The players most impressive with flanger aren't the ones using it constantly. They're the ones using it surgically—one moment per song, perfectly timed, perfectly dialed in.
That's the difference between owning a flanger and understanding flanging. One is equipment; the other is craft.
The Bottom Line: When to Use Flanger
Use flanger if:
- You want obvious, dramatic effect for solos
- You're creating atmosphere or texture
- You want to add movement and character
- You're playing alternative rock or experimental music
Skip flanger if:
- You want subtle tone enhancement (use chorus instead)
- You want warm, organic tone (use reverb and delay instead)
- You're playing traditional blues or country (not typically used)
- Your board is cramped (flanger is a luxury effect)
The pro truth: Flangers are specialist effects. Most players don't need them. But when you DO use flanger, it becomes a defining characteristic of your tone. It's not something for every riff—it's something for the moments that deserve it.
Live Flanger Price Index
UK & European retailers • Updated daily
| Pedal | Style | Country | Price |
|---|---|---|---|
| Boss BF-3 Flanger | Analog-style Flanger | Japan | €139 |
| EarthQuaker Devices Pyramids | Digital | USA | — |
| Electro-Harmonix Stereo Electric Mistress | Stereo | USA | €128 |
| TC Electronic TC Electronic Vortex Flanger | Digital Flanger | Denmark | €149 |
| TC Electronic Vortex Mini Flanger | Standard | Denmark | €38 |