Recommended Pedals
The essential Tuner pedals to know about
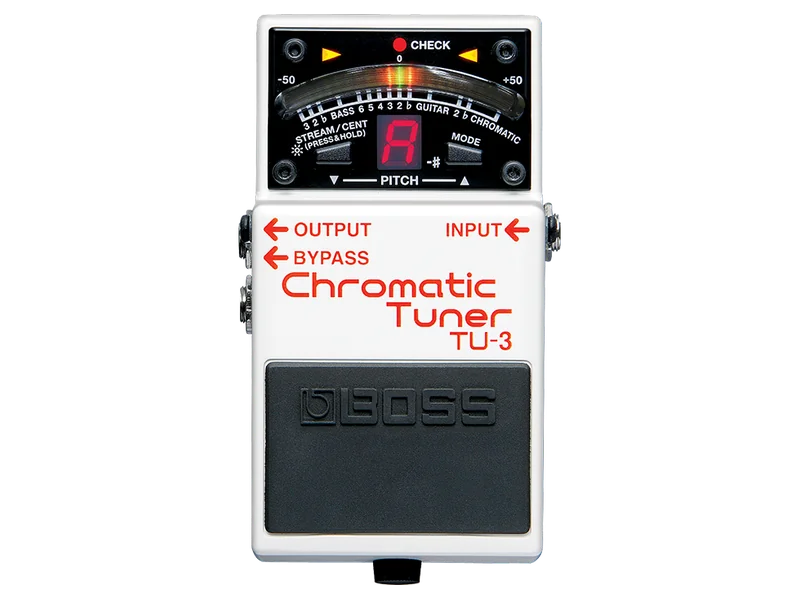
Boss TU-3 Chromatic Tuner
Bulletproof chromatic tuning with true bypass. Works before fuzz, silent footswitch, built like a tank. Industry standard for touring musicians and studio pros. If you play live, this is the answer.
Boss TU-3 Chromatic Tuner
True bypass design means zero impedance issues before your fuzz pedal. The only safe choice for protecting fuzz tone. Non-negotiable if your rig includes fuzz.
Boss TU-3 Chromatic Tuner
±2 cent accuracy is professional-grade for studio work. Proven reliability through thousands of recording sessions. Reference accuracy without the cost of a strobe tuner.
Boss TU-3 Chromatic Tuner
At $99-120, TU-3 is the best value in professional tuning. Used market is strong (easy to resell). One purchase, zero regrets. Better to invest in one great tuner than multiple mediocre ones.
Boss TU-3 Chromatic Tuner
First pedal you should buy. True bypass, professional accuracy, works in every rig configuration. Future-proof choice that won't limit your tone or signal chain as your rig grows.
Tuners seem simple but are profoundly important. They're the foundation that everything else is built on. A guitarist in tune sounds professional; a guitarist out of tune sounds amateur, no matter how good the gear or playing skill. Yet tuners are often the last piece of gear people invest in. The truth is: the best tuner is the one you use. The second truth is: tuner choice affects your signal chain in ways that ripple through your entire tone.
Why Tuner Placement Matters: The Buffer Before Fuzz Problem
This is the most important thing to understand about tuners: the tuner's bypass type affects your entire signal chain, and getting this wrong can destroy your tone if you use fuzz.
The Fuzz Impedance Problem: Buffer vs. True Bypass
Fuzz pedals are fundamentally different from other effects. Unlike overdrive, distortion, or modulation pedals, fuzz circuits depend on high impedance input from your guitar's pickups to work correctly.
Why impedance matters:
- Your guitar's pickups produce a high-impedance signal (typically 100k-500k ohms)
- This high impedance signal is what makes fuzz responsive and touch-sensitive
- When you play harder, the signal amplitude changes; fuzz "feels" this variation
- A buffered tuner lowers the impedance of the signal (reduces it through a buffer amplifier)
The disaster scenario:
You put a buffered tuner before your fuzz pedal. The tuner's buffer outputs a low-impedance signal. Your fuzz pedal then receives this weak signal and loses all responsiveness. The result:
- Fuzz tone becomes thin and brittle
- Lost sensitivity to pick dynamics
- Sound is flattened, lifeless, lacks natural bloom
- Touch sensitivity completely gone
This is why fuzz players obsess over buffer placement. One buffered tuner in the wrong place ruins the entire rig.
True Bypass Tuner: The Right Solution
How it works: When the tuner is off, a true bypass design completely removes the tuner from the circuit. Your guitar signal goes directly to the next pedal with zero interference.
Why this matters for fuzz:
- Your fuzz receives your guitar's natural high-impedance signal
- No buffer, no impedance drop, no tone loss
- Fuzz behaves exactly as it should—responsive, touch-sensitive, blooming
- Your guitar's natural dynamics pass through unchanged
The trade-off: True bypass costs more to manufacture and adds complexity, which is why true bypass tuners cost $20-30 more than buffered tuners.
What this means for your signal chain:
- Fuzz can go immediately after true bypass tuner
- No need to put fuzz at the very end to protect it
- Tuner placement becomes flexible instead of limiting
Buffered Tuner: When It's Actually Useful
Before you dismiss buffered tuners entirely, understand what they actually solve:
The cable capacitance problem:
- Guitar cables have capacitance (they store electrical charge)
- Long cable runs (20+ feet) cause high-frequency loss
- The longer your cable run, the more treble dies
- A buffer amplifier refreshes the signal, preventing this loss
When buffering helps:
- Very long cable runs from guitar to pedalboard (20+ feet)
- Multiple guitar cables daisy-chained together
- Old or cheap cables with high capacitance
- Studio setups with long snake runs
When buffering hurts:
- Before fuzz (impedance mismatch)
- Before other high-impedance dependent effects (some vintage overdrives)
- If you have short cable runs (5-10 feet)
- If your cables are already quality
The professional insight: Most touring professionals use true bypass tuners first, then add a buffer later in the chain (after fuzz, before drives). This solves both problems: preserves fuzz tone AND prevents cable capacitance issues.
This is the most important thing to understand about tuners: the tuner's bypass type affects your entire signal chain.
The Fuzz Problem: Why Tuner Placement Is Critical
Fuzz pedals need to be first in your chain, directly from your guitar. Why? Because fuzz interacts with your guitar's pickup impedance—that high-impedance signal is crucial to fuzz tone.
The Problem: If you put a buffered tuner before fuzz, the buffer lowers the impedance of the signal. Fuzz "feels" a weak, buffered signal instead of your guitar's natural high-impedance output. The result: fuzz loses responsiveness, becomes thin and lifeless, lacks the bloom and sensitivity to pick dynamics.
The Solution: Use a true bypass tuner before fuzz, or put fuzz before the tuner (less common in professional rigs).
True Bypass Tuner
How it works: When off, the tuner is completely removed from the signal path. Your guitar connects directly to the next pedal with zero interference.
Pros:
- Signal passes through unchanged when tuner is off
- No tone coloration whatsoever
- Perfect for use before fuzz
- No buffering issues or impedance problems
- Preserves natural guitar signal dynamics
- Best for tone purists and professional rigs
Cons:
- More expensive than buffered tuners
- More complex circuitry (higher failure risk)
- Slightly larger footprint (true bypass switch takes space)
- Requires quality switching architecture
Best for: Fuzz users, tone purists, professional pedalboards, anyone concerned with signal purity.
Examples: Boss TU-3 (industry standard for true bypass tuning).
Buffered Tuner
How it works: When off, the tuner includes a small buffer amplifier that maintains signal strength. The buffer is always "on" even when tuner display is off.
Pros:
- Prevents high-frequency loss in long cable runs
- Cable capacitance has zero effect
- Cheaper than true bypass
- Simpler, more reliable design
- Good solution for very long pedalboards (10+ feet)
- Fixes impedance drop issues
Cons:
- ALWAYS affects tone (even when off and not displaying)
- Incompatible with fuzz before other buffered pedals
- Adds impedance buffering that some players dislike
- Not ideal for tone-critical rigs
Best for: Players without fuzz, anyone with very long cable runs (over 20 feet), studio players not worried about signal chain order.
Examples: Basic clip-on tuners, some vintage designs, cheap Behringer units.
Tuner Types: What Each Does and When to Use It
Chromatic Tuner
What it does: Detects any note across all twelve chromatic pitches. Shows you the exact note you're playing and how many cents sharp or flat you are.
Accuracy specs: Typically ±5 to ±2 cents.
How to read it:
- Display shows the note (E, A, D, G, B, E for standard tuning)
- Needle or LEDs show how far off you are
- Center position = perfectly in tune
Use cases:
- Most common tuner type for live performance
- Perfect for standard tuning and alternate tunings
- Works with any guitar type
- Industry standard for touring musicians
Best example: Boss TU-3 (industry standard chromatic tuner).
When to choose chromatic: You need one tuner that works in any situation, you play multiple tunings, you want the most reliable option.
Polyphonic Tuner
What it does: Analyzes all six strings simultaneously instead of one at a time. Displays tuning status for all strings at once.
How it works: Analyzes the guitar's pickup signal and identifies all note frequencies present, then displays them as individual string indicators.
Accuracy: Typically ±5 to ±3 cents (slightly less accurate than chromatic because it's analyzing a complex signal).
Pros:
- Incredibly fast tuning workflow
- See all six strings at once
- Great for live performance (tune entire guitar in seconds)
- Satisfying to use visually
- Modern, intuitive interface
Cons:
- Requires clean, separated pickup signal
- Struggles with thick distortion or compression before tuner
- Slightly less accurate than chromatic tuning
- More expensive
- Polyphonic mode only works in certain scenarios
How to use effectively:
- Keep tuner near front of chain (right after guitar, before heavy drives)
- Use it for quick tuning between songs live
- Switch to chromatic mode for fine-tuning individual strings
- Works best with single-coil or well-separated pickups
Best example: Boss TU-3 (features strobe mode on display, though primarily chromatic).
When to choose polyphonic: You change tunings frequently, you want speed, you play live constantly, your band doesn't allow much tuning time between songs.
Strobe Tuner
What it does: Uses strobe technology (moving visual lines) to detect pitch with extreme precision. Far more accurate than needle-based tuning.
Accuracy: ±0.1 to ±0.01 cents (professional-grade precision).
How it works:
- Displays moving vertical lines that appear to stop when you're in tune
- The lines "freeze" at correct pitch
- Can tune with precision unachievable by ear
Pros:
- Incredibly accurate (±0.1 cent is studio-grade)
- Perfect for recording and studio work
- Builds discipline in your tuning technique
- No interpretation needed—lines freeze = in tune
- Essential for session musicians
Cons:
- Overkill for most live performance
- Slower tuning process (more precise alignment needed)
- More expensive (typically $100+)
- Requires good eyesight to read strobe lines
- Slower feedback loop than needle or LED
Use cases:
- Studio recording (non-negotiable for professionals)
- Tone-critical sessions
- Players who obsess over perfect intonation
- Reference standard for tuning accuracy
Note: Strobe tuners like Sonic Research Turbo Tuner (professional-grade reference standard) are specialized studio tools beyond standard pedalboard tuners.
When to choose strobe: You record professionally, intonation is critical to your music, you want the most accurate possible tuning, you're perfectionist about tone.
Needle Tuner
What it does: Uses a mechanical or visual needle that moves left/right to show how far sharp or flat you are. Classic analog approach.
Accuracy: Variable (±5 to ±2 cents depending on quality).
Pros:
- Intuitive to understand (needle in middle = in tune)
- Good visual feedback
- Common in vintage gear
- Mechanical appeal to some players
- Reliable and simple
Cons:
- Slower feedback than LEDs
- Needle parallax errors (viewing angle affects accuracy perception)
- Less precise than modern tuners
- Mechanical wear possible
Best example: Boss TU-3 uses a needle-style display (though it's digital, not mechanical).
When to choose needle: You like analog feel, you want classic guitar look, you prefer intuitive needle feedback over numbers.
LED/Display Tuner
What it does: Uses LEDs or digital display to show tuning status with lights (red/green) or numbers.
Accuracy: Typically ±5 to ±2 cents.
Pros:
- Fast visual feedback
- Multiple reference options (show cents, absolute pitch, etc.)
- Most modern and customizable
- Good for live performance
- Bright display visible on dark stages
Cons:
- Less intuitive than needle for some players
- Depends on understanding LED color codes
- More features can be confusing
Best examples: Boss TU-3, TC PolyTune, most modern tuners.
Understanding Tuning Accuracy: What ±5 Cents Actually Means
This is where tuning gets interesting. Most players don't realize accuracy specs mean very different things in practice.
The Cents System
What is a cent? One-hundredth of a semitone. Twelve semitones = one octave. So one cent = 1/1200 of an octave.
Practical meaning:
- ±5 cents = slightly rough, noticeable in quiet settings or single-note passages
- ±2 cents = professional standard, imperceptible to most listeners
- ±1 cent = studio standard, good enough for recording
- ±0.1 cents = mastering/intonation reference
Why Accuracy Matters
In live performance:
- ±5 cents = acceptable (audience rarely notices)
- ±2 cents = professional standard
- ±1 cent = obsessive but appreciated by other musicians
In studio recording:
- ±2 cents = minimum acceptable
- ±1 cent = good
- ±0.1 cents = reference standard (for critical parts)
In ensemble playing:
- ±5 cents = noticeably out of tune (you'll hear beats/dissonance)
- ±2 cents = sounds in tune (this is the sweet spot)
- ±0.1 cents = perfect unison (rare and perfectionist)
The Real Insight: Your Guitar Isn't Tuned Perfectly
Here's what studio engineers know: no guitarist tunes perfectly to ±0.1 cents across all six strings. Why? Because:
- Fretted instruments have intonation issues. Your saddle is set for open strings, but each fret has slightly different intonation.
- Picking dynamics matter. Harder picking flattens the note; softer picking sharpens it.
- Finger pressure changes pitch. Pressing harder sharpens notes; lighter pressure flattens them.
- Bending creates pitch variation. Your playing style actually intentionally varies pitch.
The professional approach: Tune to ±2 cents, then trust your ear and technique. Perfect intonation comes from player discipline, not tuner accuracy. A ±0.1 cent tuner won't fix finger pressure issues.
Tuning for Different Contexts
Live Performance Tuning Ritual
What professionals do:
- Tune entire guitar between songs (polyphonic mode if available)
- Check individual strings if something feels off
- Quick re-tune if needed mid-set
- Trust that ±2 to ±5 cents is imperceptible to audience
The reality: Live audiences care about groove and energy, not perfect tuning. A guitarist one cent sharp is invisible; a guitarist playing tentatively is very visible.
Studio Recording Tuning
What engineers require:
- Tune to ±1 cent minimum before each take
- Double-check tuning between takes (guitar pitch drifts with temperature/humidity)
- Use strobe tuner if recording critical parts
- Retune between different guitar passes (even same song)
Why it matters: Layered guitars will expose tuning drift. Two guitars one cent apart sound slightly dissonant when stacked.
Alternate Tunings and the Chromatic Problem
This is where tuner choice becomes critical.
The challenge: You're in Drop D tuning, and your E string is actually D. Polyphonic and LED tuners might misidentify the note. Chromatic tuner will correctly show "D" but you need to know you're tuning to D.
The professional solution:
- Keep a chromatic tuner for alternate tunings
- Label your tuning on your pedalboard (seriously—write "Drop D" on tape)
- Or use a tuner with tuning mode selector (Boss TU-3 has this)
- Test your alternate tuning before the gig
The trick: Some modern tuners (like TC PolyTune 3) have alternate tuning modes built-in. This solves the problem entirely.
Tuner Placement Rules and Exceptions
The Standard Rule: Tuner First
Place tuner immediately after guitar (before any other pedals). This ensures you're tuning your actual guitar signal without effects coloration.
Why this works:
- You tune the source (guitar), not the processed signal
- Overdrive/distortion/compression before tuner makes accurate tuning impossible
- Modulation effects make tuning confusing
- Tuner can't show you what the guitar is doing
The Fuzz Exception: True Bypass Tuner Must Go First
If you have fuzz, your tuner must be true bypass and placed before fuzz. This is non-negotiable for tone.
Why: Buffered tuner before fuzz kills fuzz tone (as discussed extensively earlier).
The Buffered Solution: Fuzz After Other Pedals
If you use buffered tuner (for some reason), put fuzz not before other pedals. Instead:
- Tuner (buffered)
- Compression/Boost
- Overdrive/Distortion (not fuzz)
- Fuzz (after buffer has already affected signal chain)
This lessens but doesn't eliminate the buffer problem.
The Pedalboard Without Fuzz
If you have no fuzz in your rig (many modern players don't):
- Tuner placement doesn't matter functionally
- Still put it first for discipline
- Buffered tuner is fine (cheaper, simpler)
- You can place it last if you prefer (unusual but works)
Buying a Tuner: The Real Decision Tree
For Most Players: Boss TU-3
The Boss TU-3 Chromatic Tuner IS the industry standard. No qualifiers needed:
Why it wins:
- True bypass (works with any rig including fuzz)
- ±2 cent accuracy (professional standard)
- Chromatic mode shows exact note
- Durable as a tank (lasts 10+ years)
- Visible display in any lighting
- Affordable ($99-120)
- Used market is strong (easy to resell)
The only downside: Not polyphonic (you tune one string at a time). This is intentional—it forces discipline and helps you learn your guitar's intonation.
Who should buy this: Everyone. Touring musicians, session players, studio professionals, beginners—all use TU-3. No category exception here.
Advanced Tuning Techniques: What Professionals Actually Do
The Strobe Tuning Method (Even Without a Strobe Tuner)
Professional engineers have been using strobe tuning for decades. You don't need a $500 strobe tuner to use this technique—the Boss TU-3 can do it.
What strobe tuning does:
Strobe tuning uses visual feedback (moving lines that freeze when in tune) to achieve extreme accuracy. Modern LED tuners like the TU-3 have a strobe mode that approximates this.
How to use strobe mode on Boss TU-3:
- Switch tuner to strobe mode (some models have this)
- Look for the moving dots or lines in the display
- Adjust string until dots/lines appear to freeze
- This achieves ±0.1 cent accuracy without a dedicated strobe tuner
Why this matters: You can achieve studio-grade tuning (±0.1 cents) using a $99 tuner instead of a $500 one.
The Reference Pitch Method: Tuning by Ear
This is what professional musicians do when they don't have a tuner available (which happens more than you'd think).
The technique:
- Remember one reference pitch perfectly (usually open E string or low E)
- Use that as your starting point
- Tune all other strings using interval relationships
- Fine-tune the rest of the guitar around that reference
The intervals:
- E to A: Perfect 4th (A is 5 semitones higher)
- A to D: Perfect 4th
- D to G: Perfect 4th
- G to B: Major 3rd (B is 4 semitones higher, slightly different interval)
- B to E: Perfect 4th
Pro tip: Hum the reference pitch while tuning. Your ear learns the interval relationships through repetition.
Temperature and Humidity: The Variables Nobody Mentions
Here's what the pros know: Your guitar's pitch changes with environmental conditions.
Temperature effects:
- Cold reduces string vibration frequency (guitar goes flat)
- Warm increases vibration frequency (guitar goes sharp)
- Temperature swing of 10°F can shift pitch by 1-2 cents
Humidity effects:
- Dry air: Fretboard shrinks, neck relief changes, action changes, pitch sharpens
- Humid air: Fretboard expands, neck relief increases, action rises, pitch flattens
What professionals do:
- Tune guitar 30-60 minutes before playing (accounts for room temperature)
- Retune during soundcheck with full band (final adjustment)
- Keep extra strings and tuner in gig bag (backup for emergencies)
- Check tuning between songs if temperature/humidity shifts significantly
The discipline: Don't blame your tuner if pitch shifts between rehearsal and performance. Blame the environment.
The Three-String Check: Quick Verification Method
When you're on stage and don't have time for full tuning:
What to do:
- Quick-check open E string (low E)
- Quick-check B string (often goes flat fastest)
- Quick-check high E string
- If these three are in tune, the rest are probably fine
Why this works: These three strings cover the widest frequency range. If extremes are in tune, midrange strings follow.
Professional Tuning Under Pressure
Live performance creates conditions that make tuning harder:
- Stage lights add heat (temperature shift)
- Adrenaline makes your hands shaky
- Limited time between songs
- Monitoring is imperfect (you can't hear clearly)
- Other band members are counting on you
What pros do differently:
- Develop a ritual. Same tuning procedure every time (muscle memory)
- Tune the same way. Always tune up to pitch (not down). This prevents slack strings
- Check while playing. Tune each string while in the playing position, not perpendicular to the tuner
- Reference the bassist. Tune your low note to match the bassist's tone (harmonic unity matters more than absolute accuracy)
- Accept good enough. In live performance, ±2 cents is imperceptible. Don't waste 30 seconds chasing ±0.5 cents
The Tuning Order Debate: Up vs. Down
The rule: Always tune UP to pitch, never down.
Why this matters:
- Tuning down: String stays loose, tension hasn't settled, can go flat again
- Tuning up: String is under full tension, locked in, stays in tune
The professional approach:
- Start low (flat the string intentionally if needed)
- Tune UP to correct pitch
- String tension is now settled and stable
This one discipline prevents most tuning drift during performances.
High-Precision Tuning: The Studio Approach
When recording where intonation is critical:
The process:
- Tune all strings to ±2 cents (initial tuning)
- Retune immediately (guitar has settled)
- Play each string individually (identify any that shifted)
- Fine-tune problem strings
- One final check before tracking
Why multiple passes: Strings settle as you bring them up to pitch. The first tuning is rough; the second is accurate.
Between takes: Retune the string(s) you just recorded. Don't assume tuning held.
Signal Chain and Tuner Placement: The Complete Rules
Standard Placement: Tuner First
Place tuner immediately after guitar, before any other effects.
Advantages:
- You're tuning your actual guitar signal
- Overdrive/distortion/compression before tuner makes tuning impossible
- Modulation effects make tuning confusing
- Tuner shows what your guitar is actually doing
Exceptions: Only if you have specific routing (like buffering for long cable runs).
The Fuzz Exception: Mandatory True Bypass
If you have fuzz, your tuner MUST be true bypass and placed first.
This isn't negotiable. Buffered tuner before fuzz = ruined tone. Full stop.
The Compression Consideration
Some players put compression before tuner instead of after.
If compression goes before tuner:
- Tuner sees the compressed signal (flattened dynamics)
- Tuning is accurate for the compressed signal you'll hear
- Makes sense if compression is always on
If compression goes after tuner:
- Tuner sees raw guitar signal
- You're tuning the source
- More accurate and standard approach
Multiple Tuners in One Rig
Some professionals carry multiple tuners:
- On pedalboard: Boss TU-3 for live performance
- Backup tuner: Clip-on or small tuner in gig bag
- Studio reference: Strobe tuner if recording often
This is overkill for most players but solves the "tuner fails right before gig" nightmare.
The Verdict: Why Everyone Uses Boss TU-3
The Boss TU-3 has been the industry standard for over fifteen years because it solves the problem perfectly without compromise:
- True bypass: Works with any rig, including fuzz
- ±2 cent accuracy: Professional standard for live and studio
- Proven reliability: 10+ year lifespan common
- Affordable: $99-120 (best value for the money)
- Used market is strong: Easy to resell if you change gear
- No learning curve: Simple chromatic interface
- Works in any lighting: Visible display on dark stages
That's it. That's the recommendation. One tuner, one choice, solved.
Your tuner is not flashy. Nobody will compliment your tuner tone. But a great tuner keeps you in pitch, which makes everything else work. The Boss TU-3 does that perfectly, which is why nearly every professional guitarist you see uses one.
Live Tuner Price Index
UK & European retailers • Updated daily
| Pedal | Style | Country | Price |
|---|---|---|---|
| Boss TU-3 | Chromatic Tuner | Japan | €94 |
| TC Electronic TC Electronic PolyTune 3 | Polyphonic Tuner | Denmark | €67 |
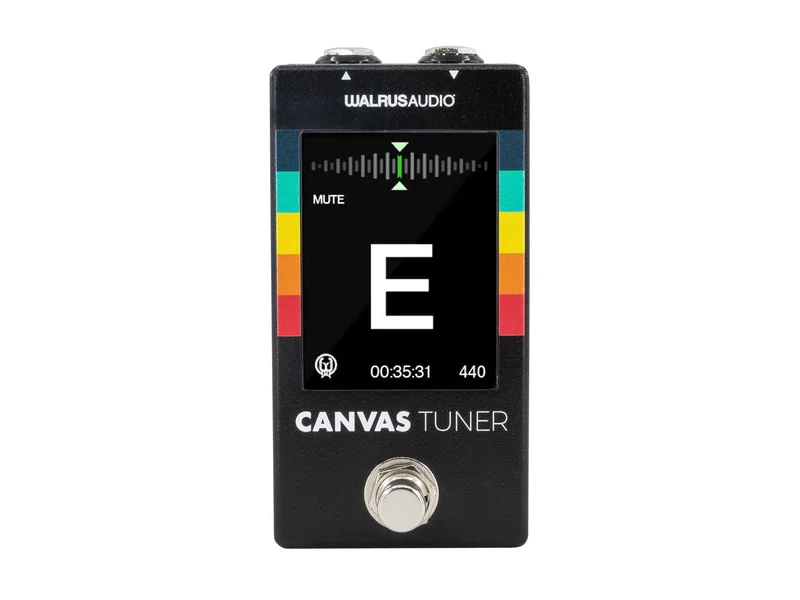
| Walrus Audio Canvas Tuner | Chromatic | USA | €152 |